Microsoft 365
- Powershell
- Search Content in Microsoft Purview
- Show Mailbox Rules for a Mailbox
- Connect to Exchange Powershell
- Grant Purview Export Permission
- Connect to Security and Compliance Powershell
- Exchange Mailbox Statistics
- Connect to Sharepoint
- Get Intune Managed Device Information
- Manually Sync macOS Device with Intune
- Change Intune macOS Personal Ownership to Company
- Admin Center
- Exchange
- Azure/Entra
- Intune
- Sharepoint
- Security and Compliance
- Outlook
Powershell
Search Content in Microsoft Purview
First, Connect to Microsoft 365 Exchange Online
Create the search
New-ComplianceSearch -Name "An Email Search" -ExchangeLocation All -ContentMatchQuery 'From:externalsender@example.com'Refine the search
This example has a date range and subject specified in the query.
New-ComplianceSearch -Name "An Email Search" -ExchangeLocation All -ContentMatchQuery '(Received:M/DD/YYYY..M/DD/YYYY) AND (Subject:"An email not to be seen")'This example searches specific folders in a specific mailbox.
New-ComplianceSearch -Name "An Email Search" -ExchangeLocation recipient@example.com -ContentMatchQuery "((folderid:YFDRIJRBV4ZOBAULB0F9E170RM3MQGBLYD8KY7YZZTJFCO14I) and (folderid:NC5MOAYATELI8Y477ALCKE9E5L08Z4OJLD4Z1I71YD836M33P) and (folderid:N34157DZ541GZQXLG0EKP5F8E9AC91558845M1GYJLBV7AOVS))"Start the search; after you create the search, you will have to start it.
Start-ComplianceSearch -Identity "An Email Search"Perform an action on the results; once you have the results, do something with it.
New-ComplianceSearchAction -SearchName "An Email Search" -Purge -PurgeType SoftDelete$Search=New-ComplianceSearch -Name "Remove an email" -ExchangeLocation All -ContentMatchQuery ‘(From:sender@example.com) AND (Subject:"An email subject") AND (Received:M/DD/YYYY..M/DD/YYYY)’
Start-ComplianceSearch -Identity $Search.IdentityTo check the status of a running search, run the command below. Pipe it to fl (Format-List) to see details.
Get-ComplianceSearch -Identity "An Email Search"SoftDelete removes the email, but it is still recoverable. HardDelete removes the email and it is not recoverable. It does not move it to the recipient's Deleted Items folder.
Microsoft Learn: New-ComplianceSearch
Microsoft Learn: Search Conditions
Show Mailbox Rules for a Mailbox
Prerequisites: Connect to Exchange Powershell
Get the rules for a mailbox
Get-InboxRule -Mailbox "name@example.com"Connect to Exchange Powershell
Prerequisites: Install Exchange Powershell
To connect to Exchange Powershell with Multi-Factor Authentication, in a Microsoft Powershell windo, run the following command.
Connect-ExchangeOnlineThis will open a new login window. After login, the window will close and the Exchange Powershell session will be active.
Microsoft: connect-to-exchange-online-powershell
Grant Purview Export Permission
When exporting the results of a Microsoft Purview Content Search, the user must have the permission. This permission cannot be granted by the same user to which it is being granted.
First, Connect to the Security and Compliance Powershell
Add eDiscovery Manager Role to admin:
Add-RoleGroupMember "eDiscovery Manager" -Member <username>Promote admin to Case Admin
Add-eDiscoveryCaseAdmin -User <username>Microsoft Answers: user-with-global-administrator-and-compliance-admi
Connect to Security and Compliance Powershell
To connect to the Microsoft 365 Security and Compliance Powershell:
- Open a Powershell Window
- Type the following command, where
<UPN>is the admin username
Connect-IPPSSession -UserPrincipalName <UPN>Exchange Mailbox Statistics
Get size, date or FolderId for folders in an Exchange Mailbox.
Get-MailboxFolderStatistics -Identity <mailbox-identity>To see folders outside of the IPM Subtree, add the -FolderScope flag.
-FolderScope NonIPMRoot
Export Results to a CSV
Get-MailboxFolderStatistics -Identity <mailbox-identity> | Export-Csv <path-to-csv>To make the information easier to read, pipe to the Format-Table command and specify which columns to view.
ft Name,FolderPath,LastModifiedTime,FolderType,FolderSizeAccording to the Microsoft Documentation, the User folders count toward the storage quota.
The group mailbox is distributed in various TargetQuota, namely System, Recoverable and User. The folders matching TargetQuota “User” is the only one considered in the calculation of the group quota.
To check the size of only User folders, pipe to the where command.
where { $_.TargetQuota -like 'User' }
To check the size of a specifc folder, pipe to the where command.
where { $_.FolderPath -like '/Inbox' }
Microsoft Documentation - Get-MailboxFolderStatistics
Connect to Sharepoint
Connect-SPOService -Url https://example-admin.sharepoint.com -credential admin@example.comGet Intune Managed Device Information
To get device information for Intune managed devices, use the Get-MgDeviceManagementManagedDevice cmdlet using the Exchange Powershell module.
Get all devices.
Get-MgDeviceManagementManagedDevice -All:$trueFilter devices by device name.
-Filter "contains(DeviceName,'<device_name>')"Get specific devices from a CSV.
Import-Csv <csv_name>.csv | % { Get-MgDeviceManagementManagedDevice -All:$true -Filter "contains(DeviceName,'$($_.Name)')" }Manually Sync macOS Device with Intune
In Company Portal, click the ellipses and Check Status or press command+option+S.
To trigger a sync form the CLI, force close the Intune Agent process.
Use ps to list running processes; the -A flag specifies all running processes. Pipe the output to the grep command and search for the Intune MDM agent.
ps -A | grep IntuneMdmAgent
This confirms the agent is running in the following location.
/Library/Intune/Microsoft Intune Agent.app/Contents/MacOS/IntuneMdmAgent
Kill the Intune MDM Agent. The agent will automatically restart and trigger a check-in and sync with Intune.
killall IntuneMdmAgent
Change Intune macOS Personal Ownership to Company
Get-MgDeviceManagementManagedDevice -All | Where-Object {$_.ManagedDeviceOwnerType -eq "unknown" -and $_.OperatingSystem -like "macOS"} | % { Update-MgDeviceManagementManagedDevice -ManagedDeviceId $_.Id -ManagedDeviceOwnerType company }
Admin Center
https://admin.microsoft.com/
Exchange
Prevent Spoofing of Executives
To add a disclaimer for incoming emails that bear the name of an executive, go to the Exchange Transport Rules and create a rule.
https://admin.exchange.microsoft.com/#/transportrules
Rule Conditions:
The Message Header From Contains executive names
AND
The message is from an external sender
Then Prepend Disclaimer
'<h1 style="front-size: 150%;"><span style="text-decoration: underline; color: #ff0000;"><strong>WARNING!</strong></span><span style="color: #ff0000;"><strong> -</strong>This might be a phishing attempt.<strong>- Orange Bench</strong></span></h1>'Azure/Entra
Azure Dynamic Groups
Azure Dynamic Group Membership Rules
Rule Syntax to add group members based on the criteria
- Account is active
- Primary Email Address is at domain
example.com
(user.accountEnabled -eq true) -and (user.mail -contains "@example.com")- License includes
Exchange Online (Plan 1) - Plan is enabled
user.assignedPlans -any (assignedPlan.servicePlanId -eq "9aaf7827-d63c-4b61-89c3-182f06f82e5c" -and assignedPlan.capabilityStatus -eq "Enabled")- Users that are members of group with Object ID
9dba4c67-5cd4-449d-a1c3-51865c374cab
user.memberof -any (group.objectId -in ['9dba4c67-5cd4-449d-a1c3-51865c374cab'])- Username contains
@example - Email Alias contains
@example - Company Name is
Example Company
(user.userPrincipalName -contains "@example") or (user.proxyAddresses -any (_ -contains "@example")) or (user.companyName -eq "Example Company")Microsoft Learn | Dynamic Rules
Add user to Azure AD Application
Azure applications are used for Single Sign On, among other things. To use SSO, the user has to have access to the application.
First, login to the Microsoft Admin Portal then go to Azure Active Directory (or skip this step and go directly to Azure Active Directory).
Go to Enterprise Applications > All Applications and search for the application. Then select it from the list.
Select Assign users and groups. Then click Add users/group.
In Add Assignment click None Selected under Users and Groups.
Search for the user, then select from the list. Then click the Select button.
Then click the Assign button. The status box will pop up to show progress. Once it shows it's complete, the user has been assigned to the application.
Intune
Reset a Windows Device
Prepare Device for Reprovisioning
Select Autopilot Reset and then confirm.
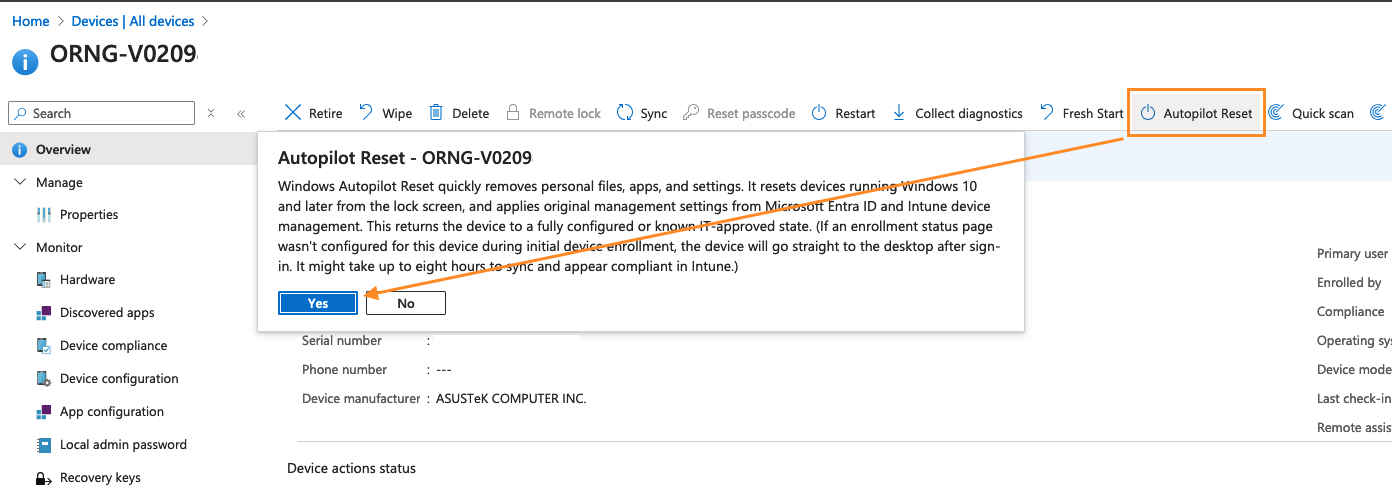
This will return the device an IT approved state and make it ready for a new user.
Prepare Device for Deprovisioning
To factory reset the device, navigate to the Intune Admin Portal https://intune.microsoft.com/ > Devices > All Devices and select the device.
Click Wipe and confirm.
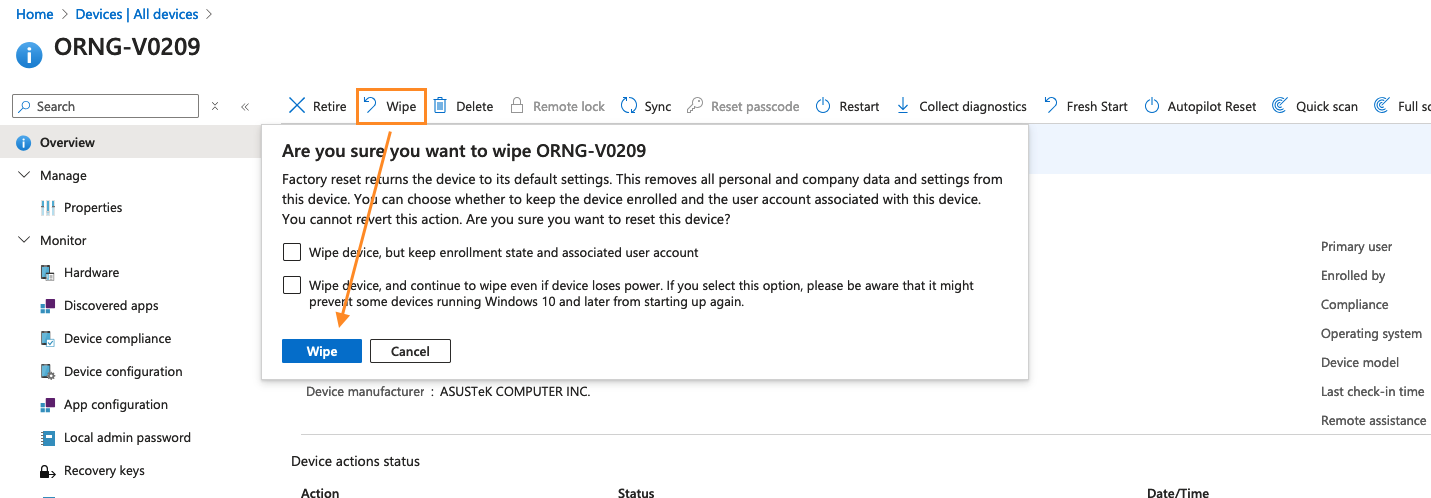
This will return the device the factory state and make it ready for disposal.
Sharepoint
Share content with external users
Select the type of sharing by clicking the People in... link and then change it to Specific People.
Select Specific People. Optionally, check the box to allow editing.
Type in the email address of the external user(s) to share with. Then click Send.
Then it will confirm that it was successful.
Manage OneDrive Profiles
To get OneDrive Profiles for licensed users or users that were previously licensed, go to the Sharepoint Admin center. You can grant a user access to another user's OneDrive files. This is useful for the successor of a departed employee.
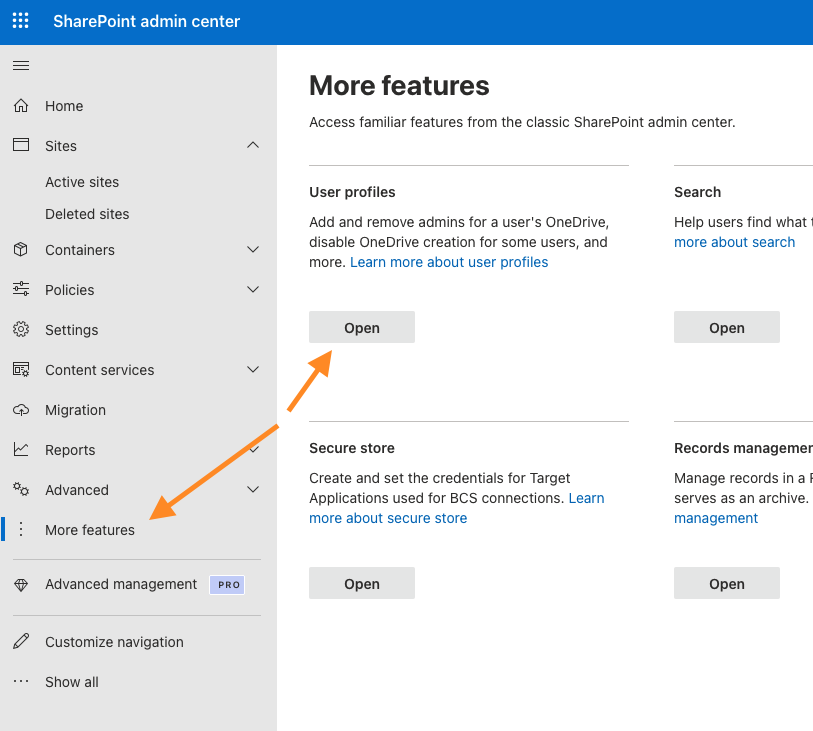
Click Manage User Profiles.
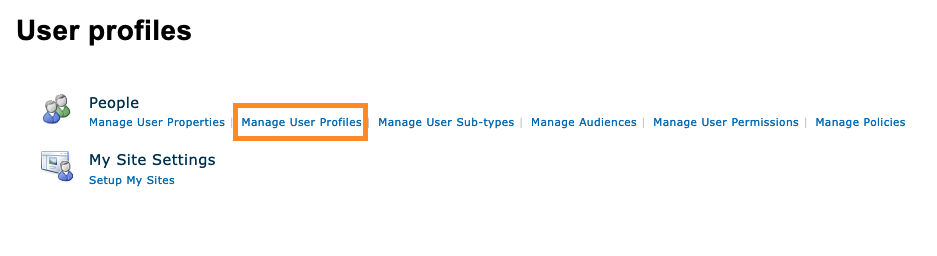
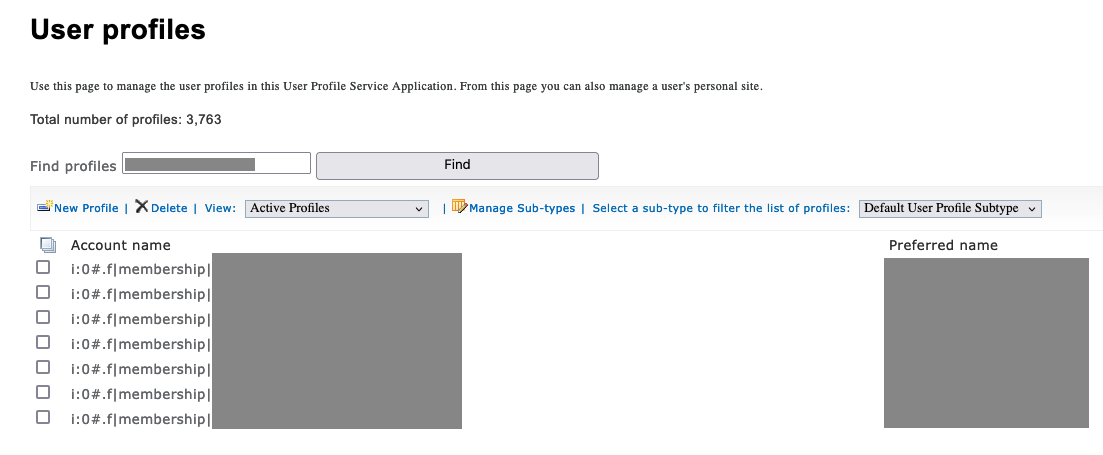
In the search box, type the name of the user and click Find.
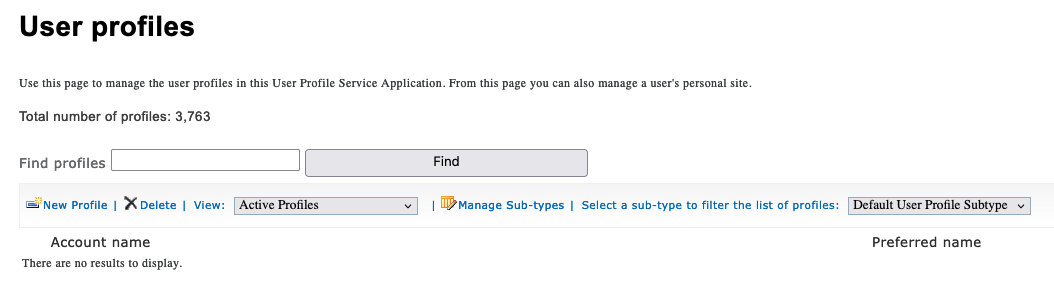
In the search results, click the profile you want to manage.
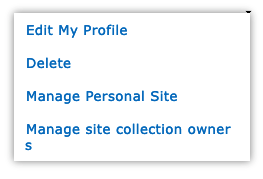
In the Site Collection Administrators box, type the name of an administrator to add, or choose from the list. Then click OK.
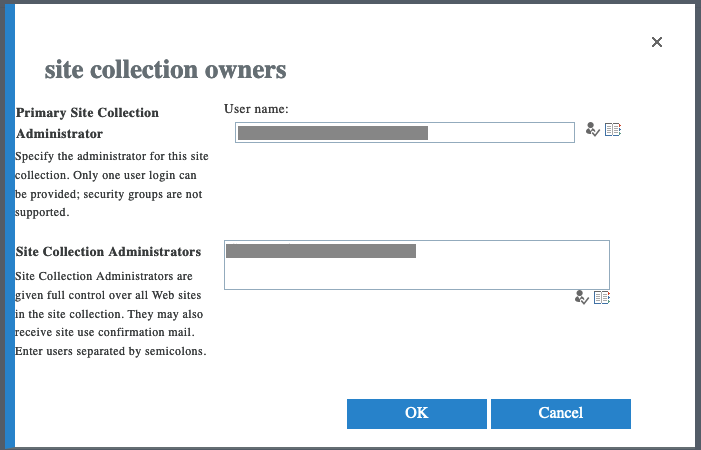
The account that was granted access can access the files by going to the OneDrive URL of that specific account. In the example below, replace <tenantname> with the Tenant name and user_name_example_com with the account's email address, replacing the @, periods and dashes with underscores.
https://<tenantname>-my.sharepoint.com/personal/user_name_example_com/
Security and Compliance
Outlook
Outlook on the Web
Change filter settings in Outlook on the Web
Login to your account at https://outlook.office.com
- Click the gear icon on the top right of the page.
- Click Mail in the right column toward the bottom.
- In the left column of the Mail settings, click Block or Allow.
- Add acceptable email addresses to the Safe Senders list.
- Add unacceptable email address to the Blocked list.
- Once you are done with your changes, click Save at the top of the page.


Alternatively, you could allow all senders to be delivered to the inbox by selecting Don't move email to my Junk Email folder and click Save.
Send as a Group in Outlook
To send a message as a group or shared mailbox from your own account, first the admin has to grant Send-As permissions for your account on the target group.
In Outlook, start a new message. By default, the From address is not shown. First, you need to Show From.
On the Options tab, select the three dots on the right side. Under Show Fields, choose From.
Your account email address will show in the from box. Drop-down the From menu and select Other Email Address.
Type the group or shared mailbox email address to send from. Then click OK. If you don't know the email address, you can click the From button and find the address in the directory.
Once you have sent from a group or shared mailbox, when you drop-down the from list, the recently used email addresses will be in the list.
Setup Microsoft 365 Account
The first time you sign-in to your account on Microsoft 365, there are some account setup tasks to be done.
office.com
To get started, first go to office.com and click Sign in.
Enter your username (your username is in the form of an email address). Click Next and then enter your Password.
Change Password
After successful login, you will be prompted to change your password. Enter your temporary password first, then choose a password that is complex.
Multi-Factor Authentication
After updating your password, you will need to setup Multi-Factor Authentication (MFA). Click Next.
Mobile App
You will need to download the Microsoft Authenticator app.
Apple: https://apps.apple.com/us/app/microsoft-authenticator/id983156458
Android: https://play.google.com/store/apps/details?id=com.azure.authenticator&pli=1
Back to your account setup, click Next to start the authenticator enrollment.
Click Next.
You should see a QR code that looks like a pixelated square.
On the Authenticator app, click the plus +, or click Sign-In or Add Account.
Choose the Work or school account option.
Choose Scan QR code. You will be asked to grant the app permission to use the camera. Click Yes or Allow. You can disable camera access after the enrollment process.
Scan the QR code with your smartphone's camera.
Once the code has been scanned, the account is added. Click Next. Your authenticator app on your smartphone will receive a notification to allow the sign-in. Click Allow and then enter the number shown on your screen and press Yes.
After you have approved the sign-in, a confirmation will be displayed on the screen. Click Next.
Your authenticator app has been enrolled. Click Done.
Signed-In
Your sign-in and MFA enrollment has been completed. Click Yes to stay signed-in on this device. If you are using a public computer, choose No.
Finally, a welcome - get started message will be displayed. Click the right arrow on the screen to click through the tutorial and then click the check mark to close it.
You are now signed-in. At this point you can choose an application to open from the left hand shortcut menu or the waffle application launcher at the top left corner.